Note: This article is based on Lottie Creator beta version 1.12.0. Please note that the interface and features may have evolved since publication. Additionally, while the core features remain intact, embedded video tutorials might not reflect the latest updates.
Welcome to our comprehensive guide on mastering Lottie Creator, our web-based animation tool for creating stunning Lottie animations. Lottie Creator offers a user-friendly interface and a plethora of features perfect for motion design.
In this article, we delve into the fundamentals of Lottie Creator, from navigating its interface to animating SVG images and utilizing the vast library of animation presets and more. Armed with Lottie Creator's capabilities and the tips shared here, you're well on your way to creating Lottie animations that are captivating and engaging.
Looking at the Lottie Creator interface
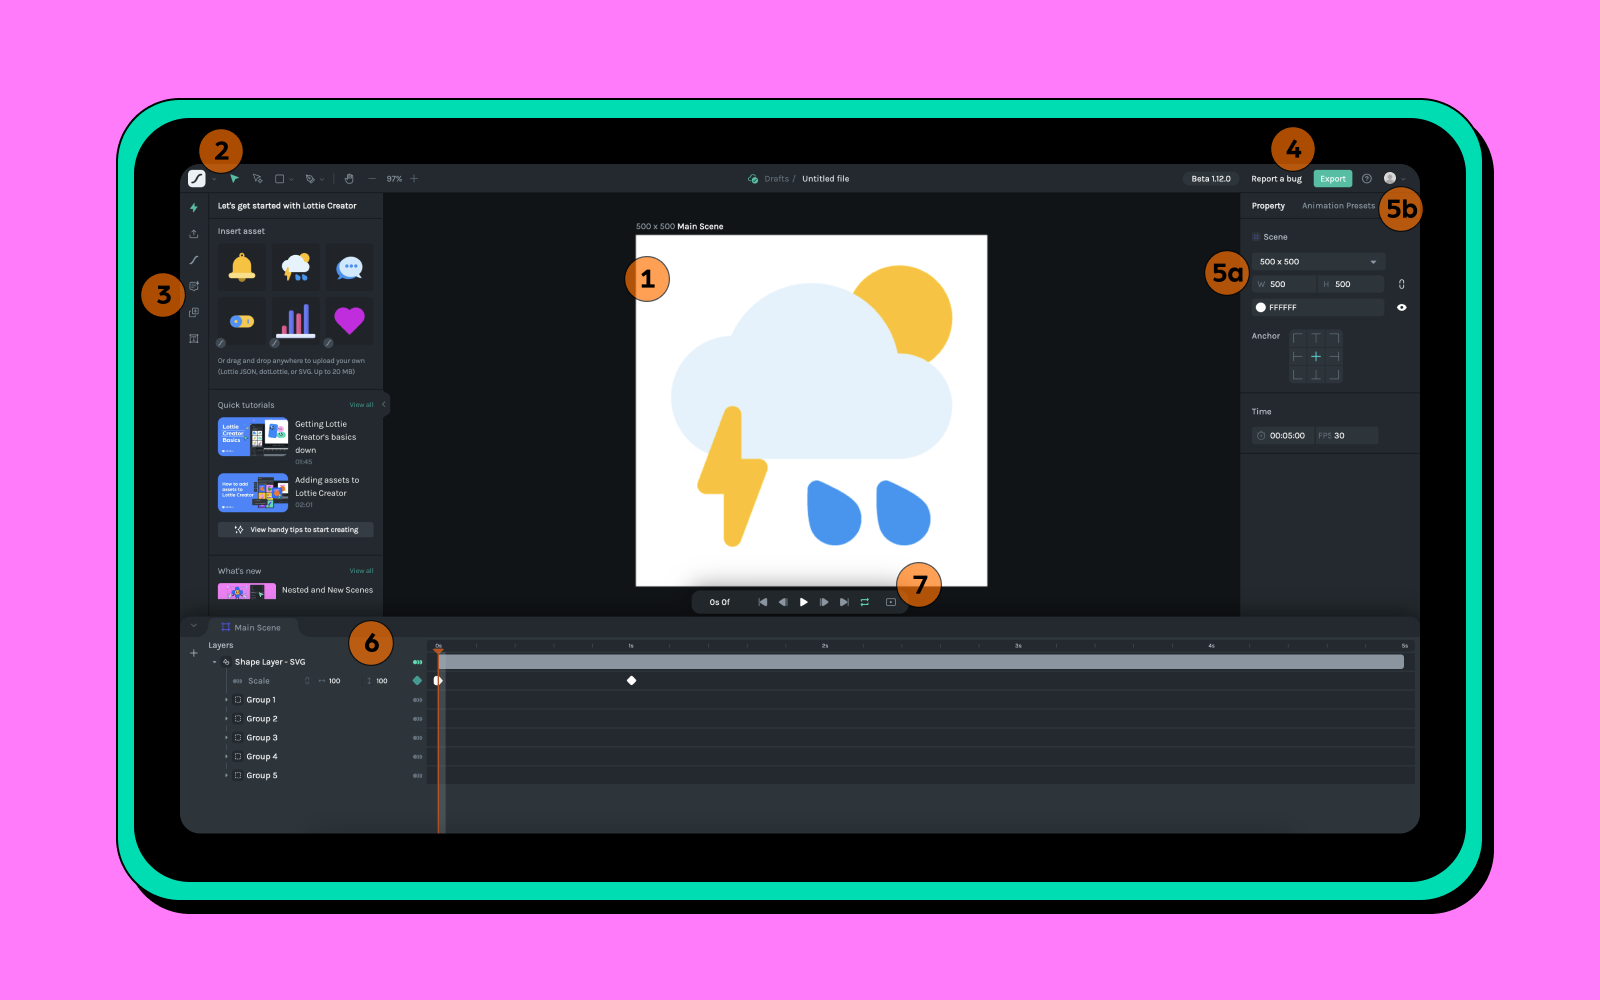
- Canvas: The heart of your workspace for moving objects and previewing your Lottie animations, a pivotal part of creating motion graphics.
- Primary menus: Includes the menu, object selection, preset shapes, hand tool, and zoom level.
- I/O menus: Access to start, upload animations, and discover new animations.
- Secondary menus: Access to start, upload animations, and discover plugins such as animation library, duplicator plugin, AI Prompt to Vector, and Kinetic Typography.
- Right sidebar: Contains the property panel and animation presets panel.
- Property panel: allows you to modify scene settings and view or edit properties of objects.
- Animation presets: consist of various In, Highlight and Out animation presets
- Timeline: Here, you find all the layers and the timeline, crucial for controlling your animation.
- Playback controls: Includes play, stop, loop, and preview features.
How to add assets into your Lottie Creator canvas
Using the available options within the LottieFiles ecosystem
- Primary Shapes: Easily select and customize shapes such as rectangles, ellipses, and stars from the property panel.
- Discover Animations: Choose from a library of over 100,000 customizable Lottie animations readily available within Lottie Creator.
- Private animation from Workspace: Modify animations in your private library for a personalized touch.
How to import your own design assets to Lottie Creator
Importing your SVG images and other file formats into Lottie Creator unlocks a world of possibilities for creating Lottie animations. Whether you're working with designs made from Figma, Adobe Illustrator, or other design tools, Lottie Creator is built to seamlessly integrate with your design workflow. You can import your designs directly from your computer or via a URL, making it flexible to work with files stored locally or hosted online.
Here's a breakdown of the supported file formats and how you can upload:
- SVG files: Ideal for vector graphics created in design tools like Adobe Illustrator or Figma. SVG support in Lottie Creator is particularly useful for designers looking to animate logos, icons, or other vector-based artwork.
- Lottie JSON files: If you have Lottie animations or JSON files, you can further customize and animate them within Lottie Creator.
- dotLottie files: An extension of the Lottie ecosystem, dotLottie files are a compact, self-contained format for Lottie animations. Like JSON files, dotLottie files can be imported into Lottie Creator for editing and customization.
How to add and edit keyframes in Lottie Creator
Keyframes help mark the flow of any motion, controlling the animation flow. Here's how to effectively use them:
- Position the playhead: Begin by setting the playhead at your animation's start point.
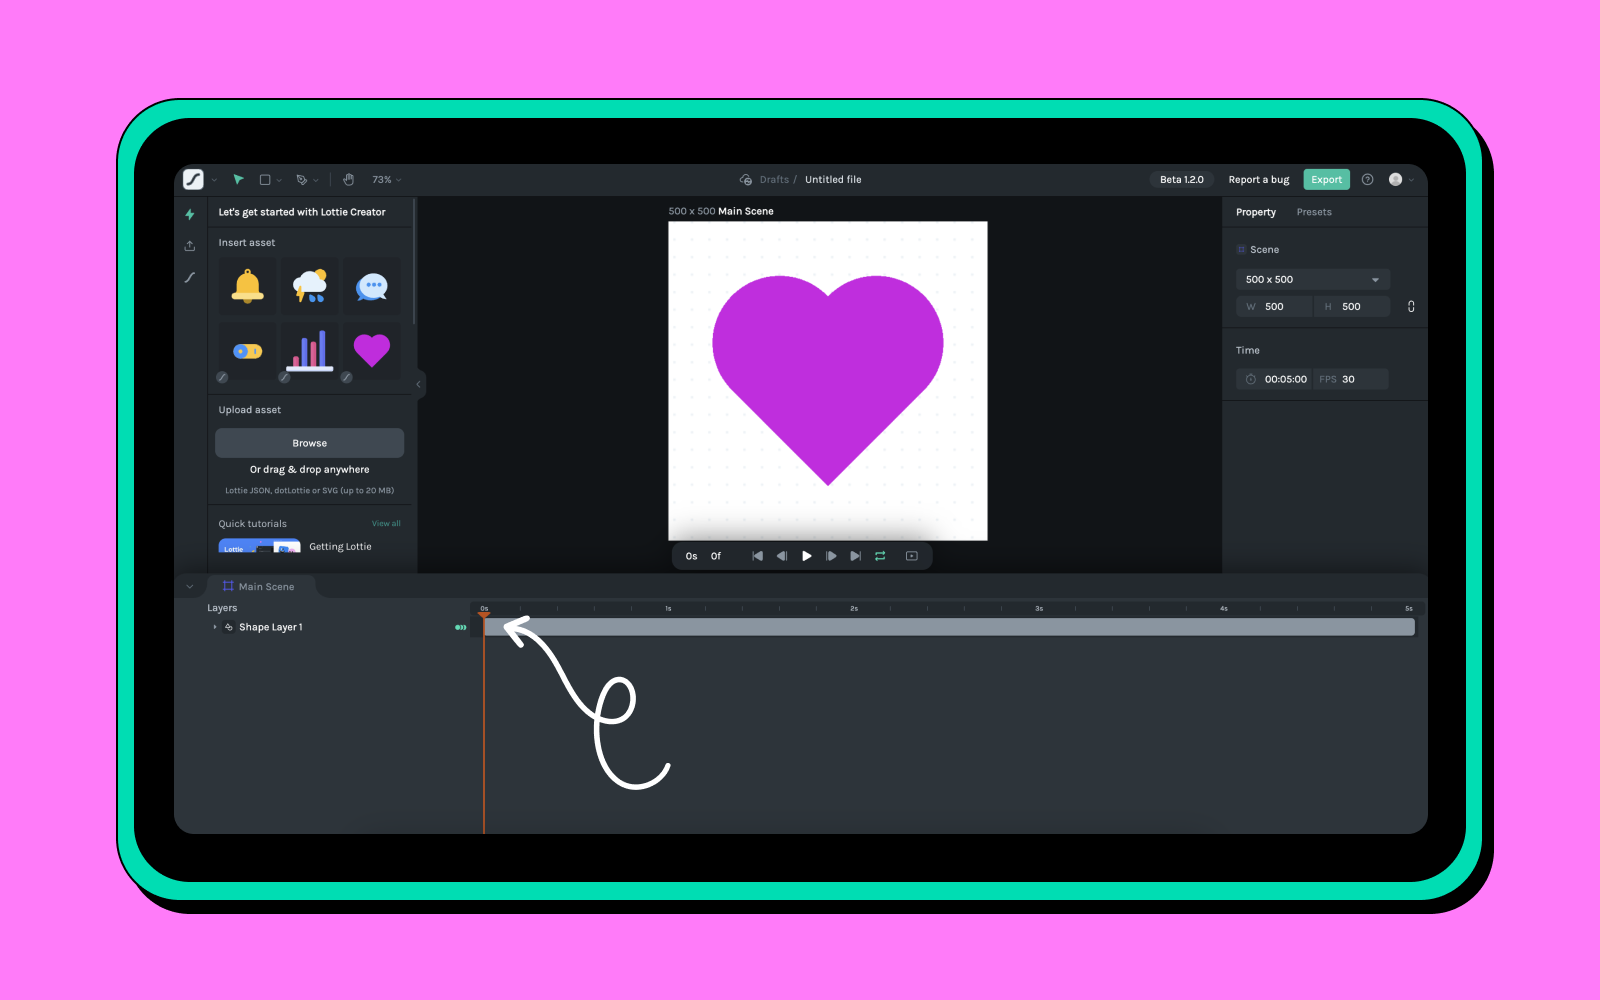
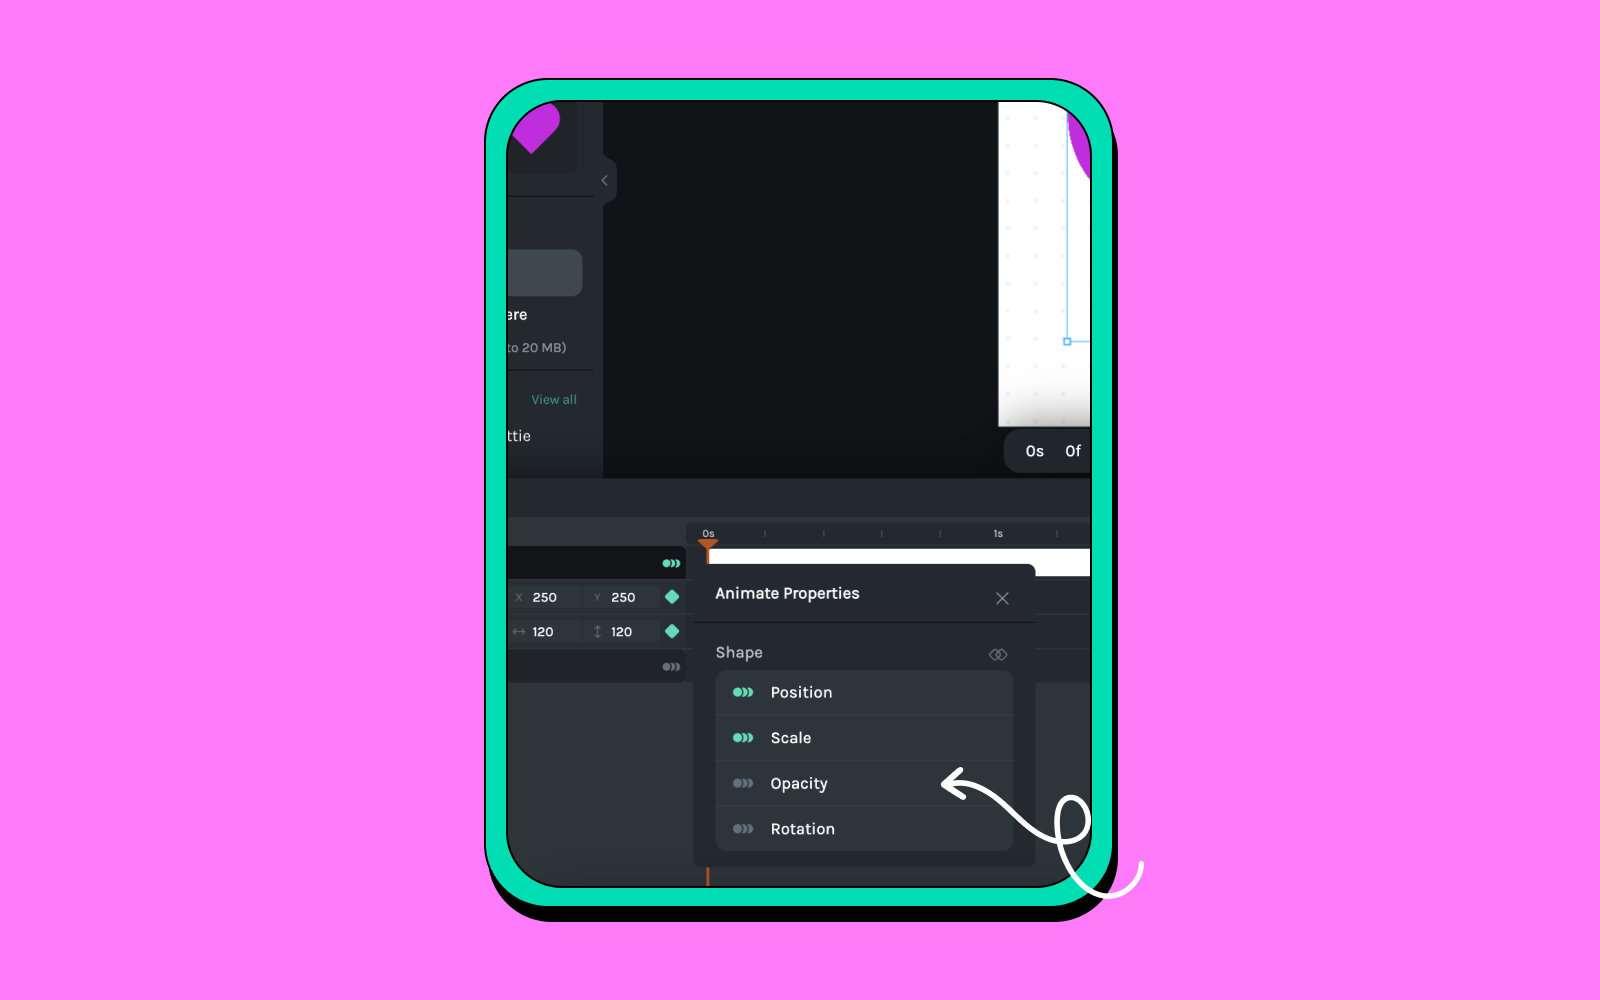
- Add Keyframes: Click the button next to a property in the Property panel or...
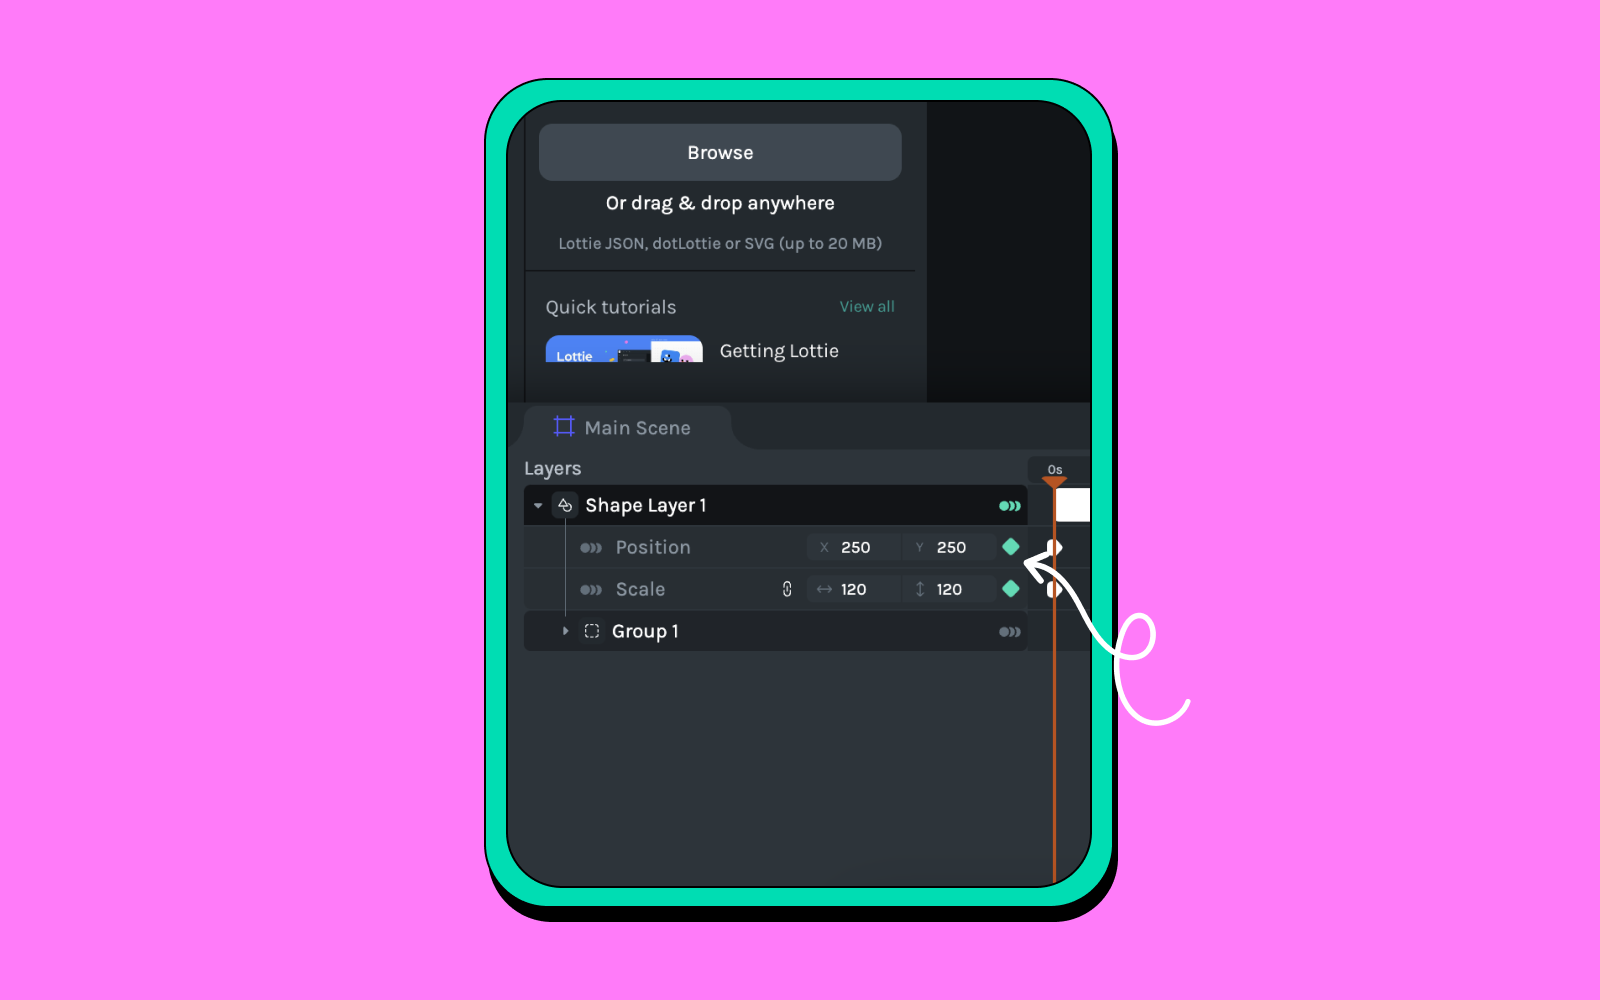
or use the Animation Toggle button to select and animate properties such as movement (position), size (scale), visibility (opacity), and orientation (rotation).
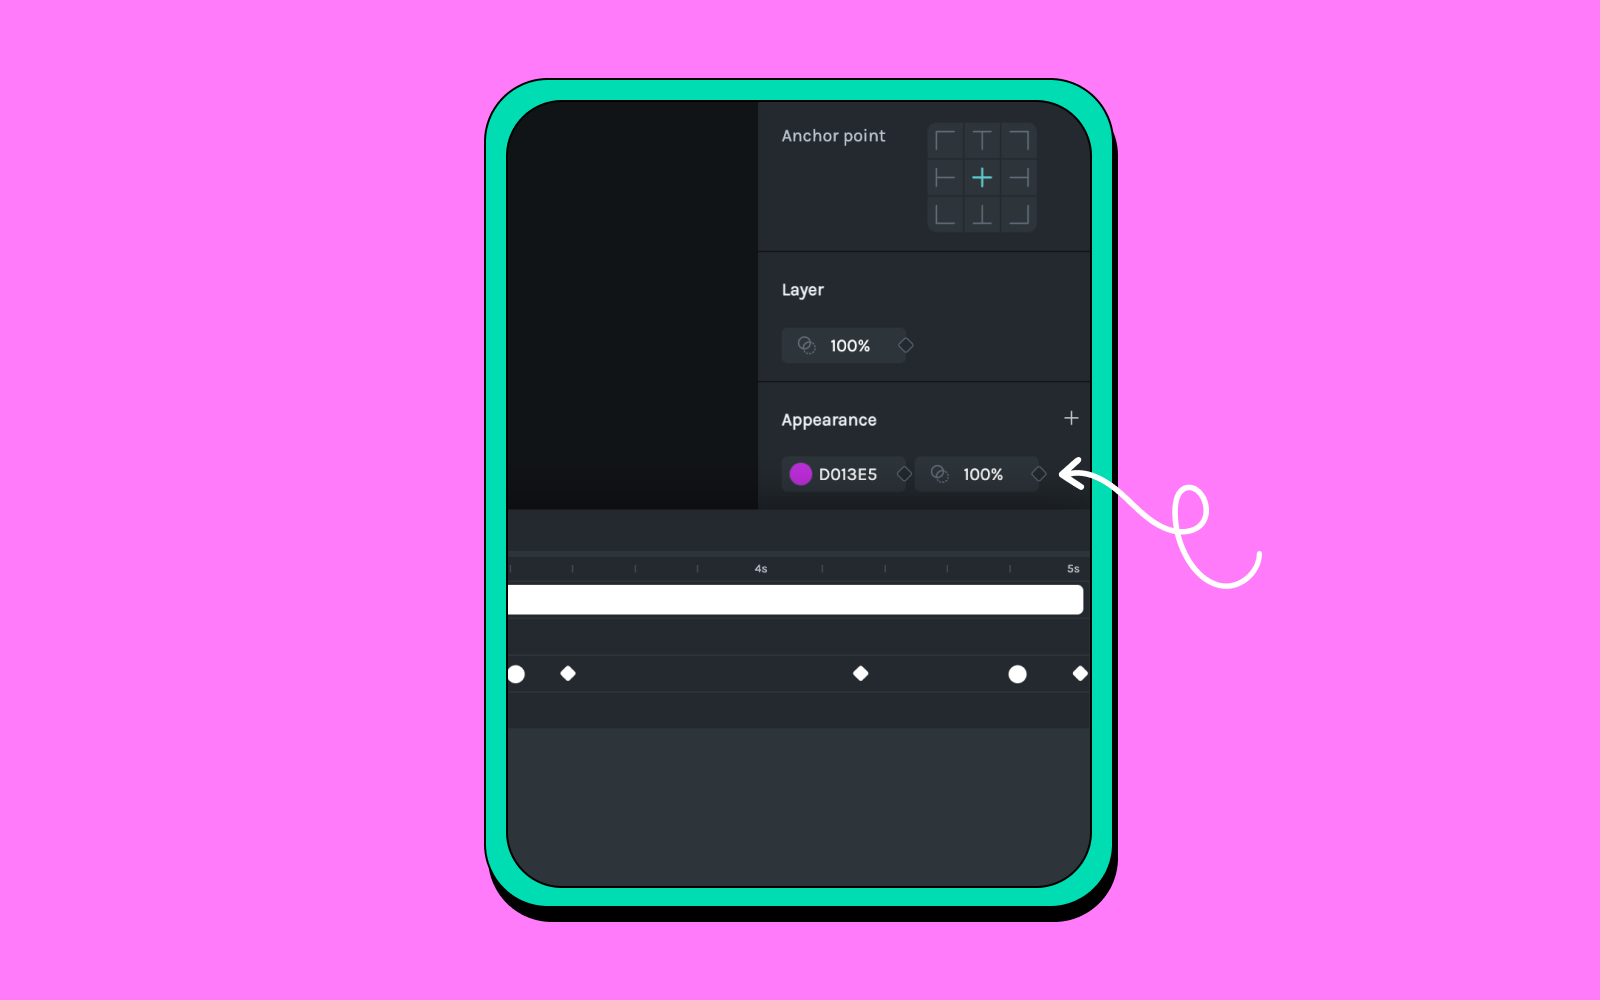
- You can also change the appearance of your object within the timeline by adjusting the fill colors of the different keyframes.
- Adjust keyframe values: You can input values directly on the timeline, or adjust them by moving the object in the scene. Adjusting the values will automatically create keyframes in the timeline.
- End of action: Move the play head to the end frame and adjust the values for the final keyframe. Alter the distance between keyframes on the timeline to speed up or slow down the animation's pace.
- Enhance complexity: For more intricate animations, introduce additional keyframes or animate further properties to enhance your animated elements. Experiment with the sequence and timing to achieve the desired motion.
- Copy and paste keyframes: Leverage the copy and paste functionality to replicate animations across different objects or properties, enhancing your efficiency and consistency.
Understanding how layers work on Lottie Creator
In Lottie Creator, layers are organized hierarchically, with parent shape layers encapsulating one or more child layers. This structure allows changes made to a parent layer to automatically apply to all nested child layers, streamlining the animation process and minimizing the need for manual adjustments.
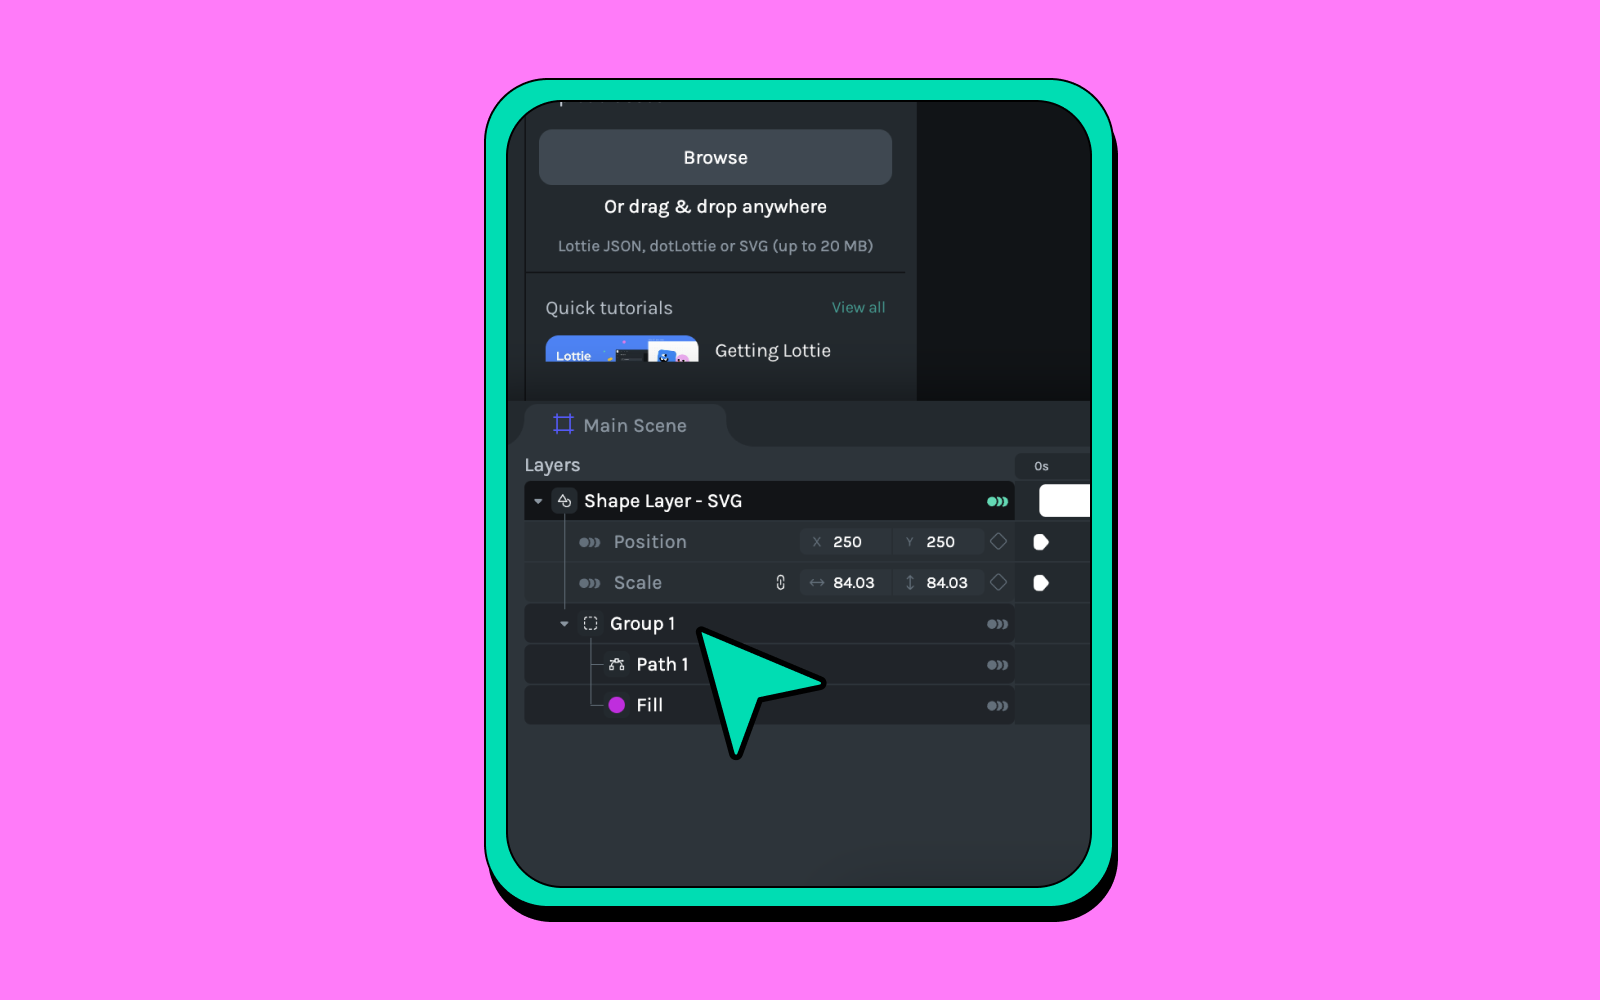
Layer components
At the base of the layer hierarchy, you'll find the path of the shape along with appearance layers that determine the visual attributes like color. For the animation to interpret these appearance changes correctly, it's crucial that fill and stroke layers are positioned below the shape paths within the layer stack. This setup mirrors the layer management seen in Adobe After Effects, ensuring familiarity for users transitioning from traditional animation software to Lottie Creator.
Practical animation tips
- Keyframe animation on shape layers: For effective animation control, add keyframes directly to the shape layer. This approach ensures that any transformation or animation applied is uniformly affected across the entire layer structure.
- Finding properties: If you're unable to locate a specific property on the shape layer, dig deeper into the path layer. More often than not, the property you intend to animate will be available there, providing an additional level of detail to your animations.
How to animate SVG files in Lottie Creator
Animating SVG files in Lottie Creator opens up a world of possibilities for creating dynamic and visually appealing animations. Follow along with our video tutorial to see these steps in action.
- Animating the smoke: Adjust the smoke's anchor point to the bottom of the rocket. This ensures that the smoke animation is anchored correctly, simulating a realistic launch effect. Scale the smoke while locking its aspect ratio to mimic the expansion of smoke as the rocket takes off.
- Animating the rocket: Utilize the position property to animate the rocket's movement across the canvas. Repeat the position animation process for the flame layer to create the effect of the flame moving with the rocket.

- Animating using color: Use the eyedropper tool to match the smoke's color to the flame's pink, enhancing the animation's visual consistency. This will give the look that the flame is changing colors as it blasts off.
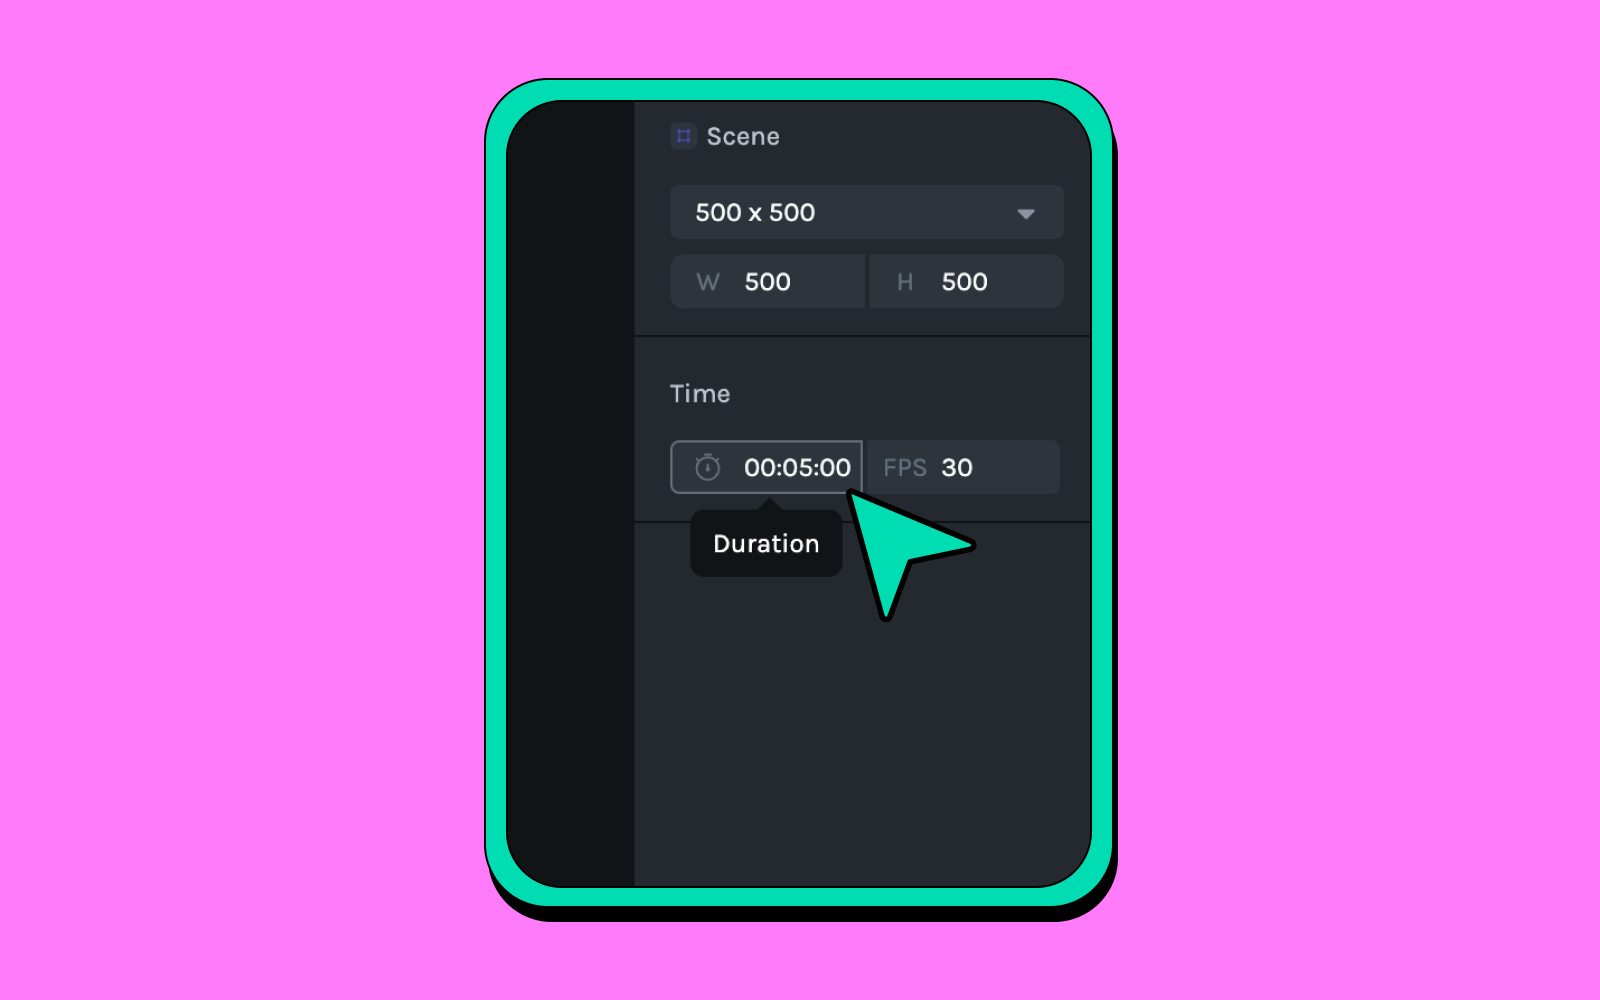
- Add animation duration: On the property panel, adjust the timeline to the duration that fits our animation time needs.
Animating using animations from the library
Lottie Creator has its own inbuilt library with over 100,000 Lottie animations readily available for you. To use these animations…
- Search and browse: Type in keywords on the search bar to find the animation that you would like to incorporate into your design. You can import as many as you like.
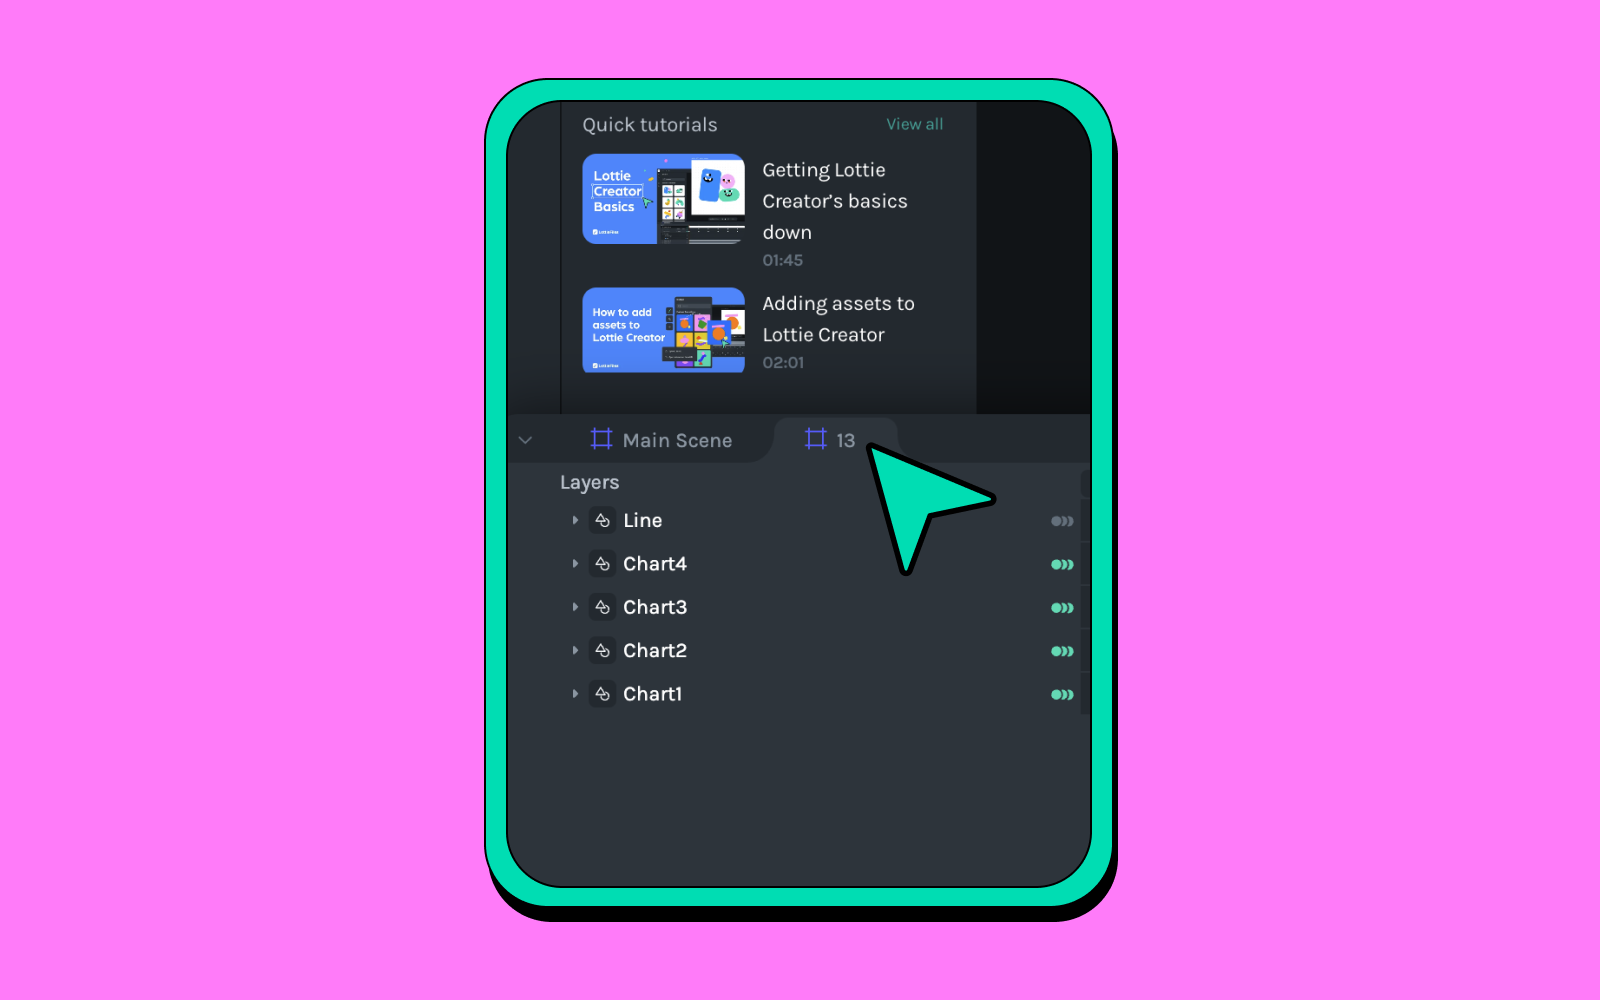
- Nested scene: An imported Lottie animation will be inserted as a nested scene. If you want to find specific layers, switch to a different scene from your timeline. After that, you can adjust the animation and tweak it further to your desired look, feel and movement.
Using animation presets on Lottie Creator
Lottie Creator streamlines the animation process with an array of built-in presets designed to enhance your projects effortlessly. Here’s how you can leverage these presets:
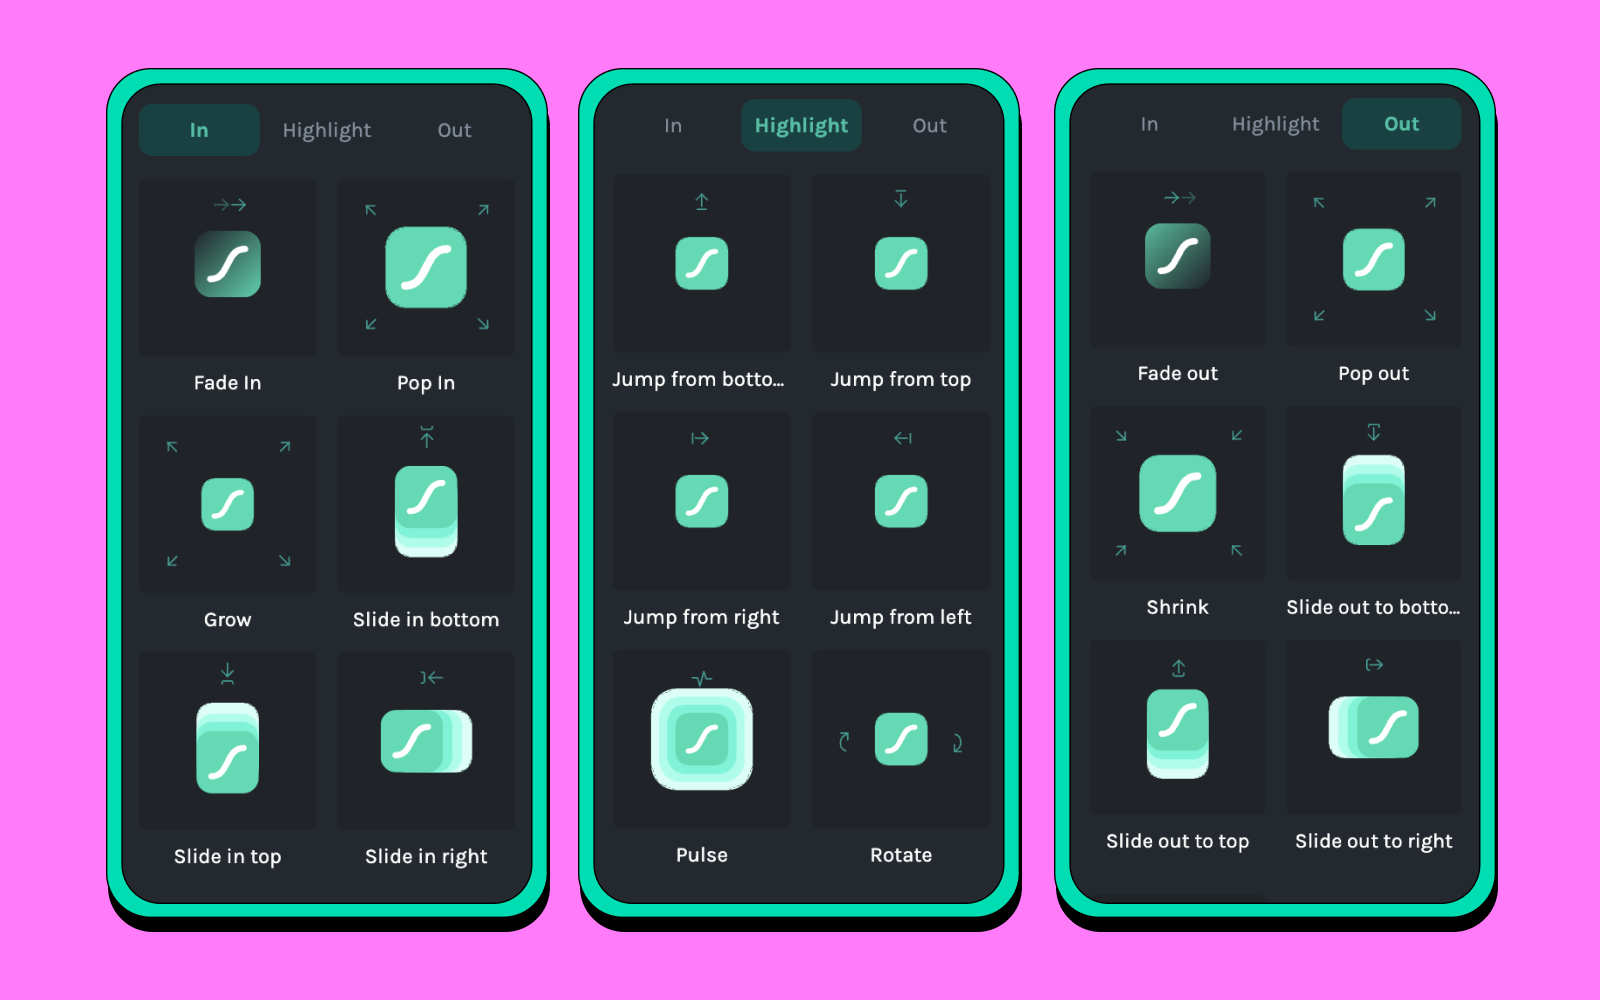
Types of Animation Presets
Lottie Creator categorizes its animation presets into three primary groups to cover various phases of your animation:
- In: Presets designed to introduce elements onto the canvas smoothly.
- Highlight: Enhance the presence of elements with attention-grabbing effects.
- Out: Gracefully conclude elements' presence on the canvas with exit animations.
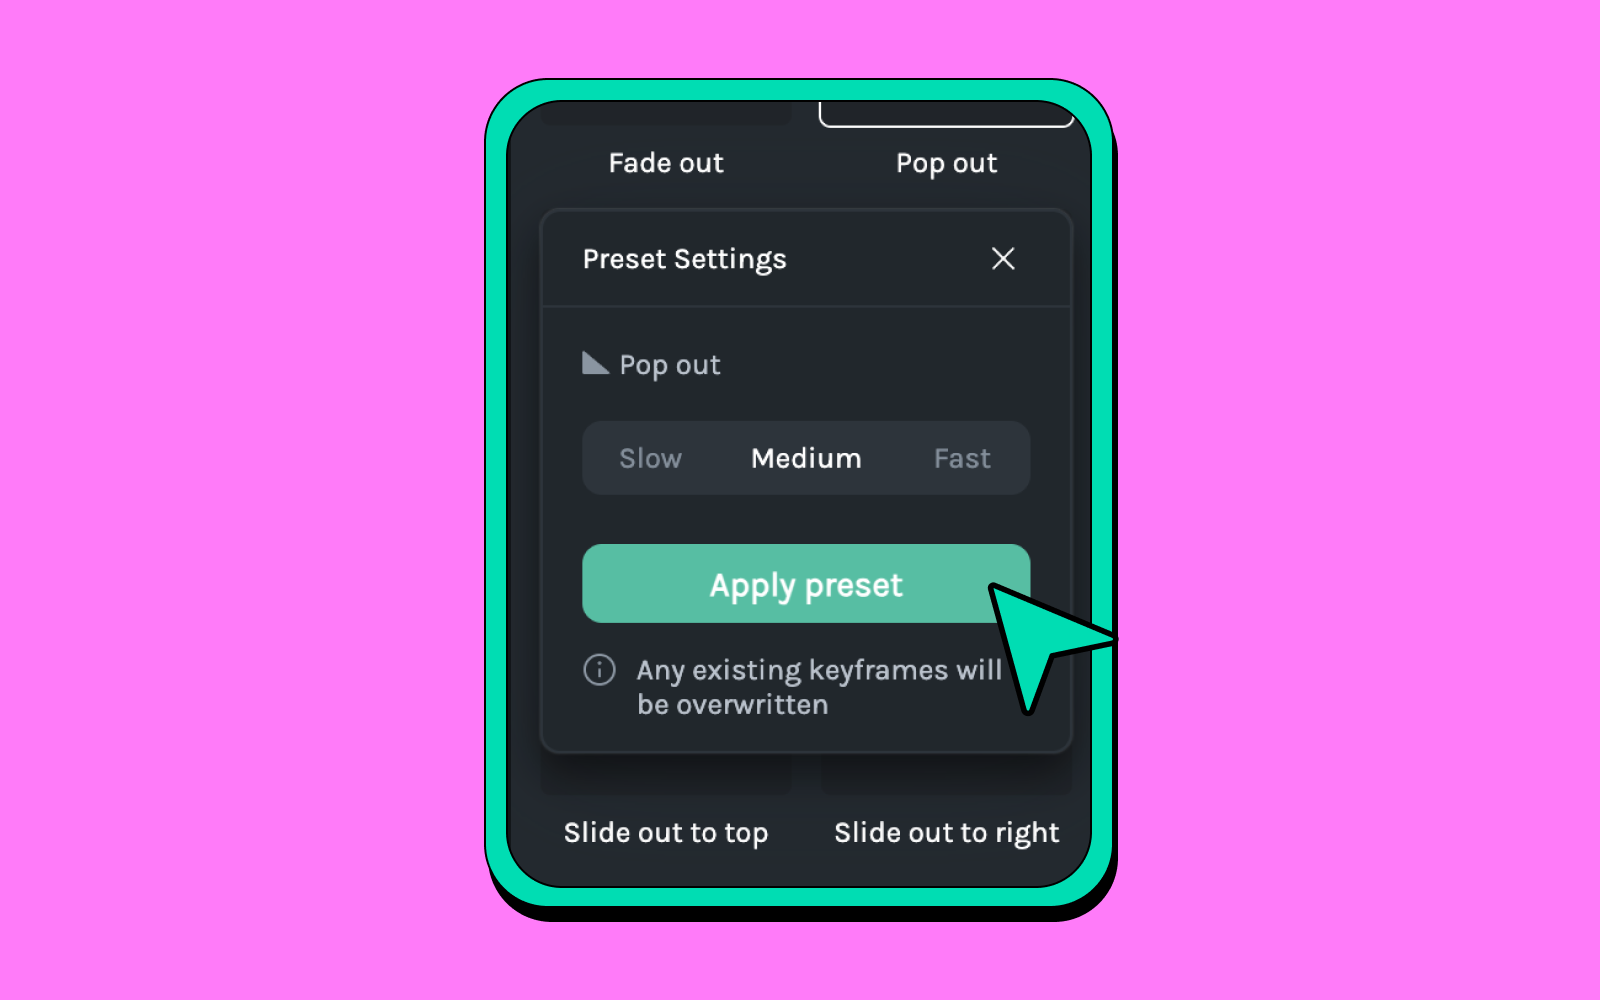
Choosing Preset Speeds
Upon selecting an animation preset, you’ll encounter the preset setting menu. This menu offers the flexibility to choose the speed of the animation according to your project's needs:
- Fast: For quick, snappy transitions.
- Medium: A balanced speed that suits most animations.
- Slow: For a more gradual, deliberate transition.
How to export animation in different file formats with Lottie Creator
One you have created an animation on Lottie Creator you can always save it to your LottieFiles workspace and download it in your preferred format. To do so
- Press the Export button, this will take you to your LottieFiles workspace where you can save and give a name to your animation.
- Then save it to your prefer location
- Once you have saved, your animation will pop up within your workspace, your screen. On the left-hand side, you will find the Download & export panel. You can choose from Lottie JSON, dotLottie, Optimized formats and various other popular formats available on the bottom for your project.
Alternatively, you can go to the Handoff & Embed panel to obtain the Asset link, Embed HTML code, oEmbed URL, iFrame and other developer handoff options any format you like.
How to use easing on Lottie Creator
Easing refers to the method by which animations transition between keyframes. In most cases, and in most software including Lottie Creator, the animation follows a linear easing by default, where the animation progresses at a steady rate from one keyframe to the next.
This uniform movement can often appear robotic and unnatural, as in the real world most things move at various speeds, it isn’t usually constant.
To enhance the realism and fluidity of animations, you can use different types of easing options such as:
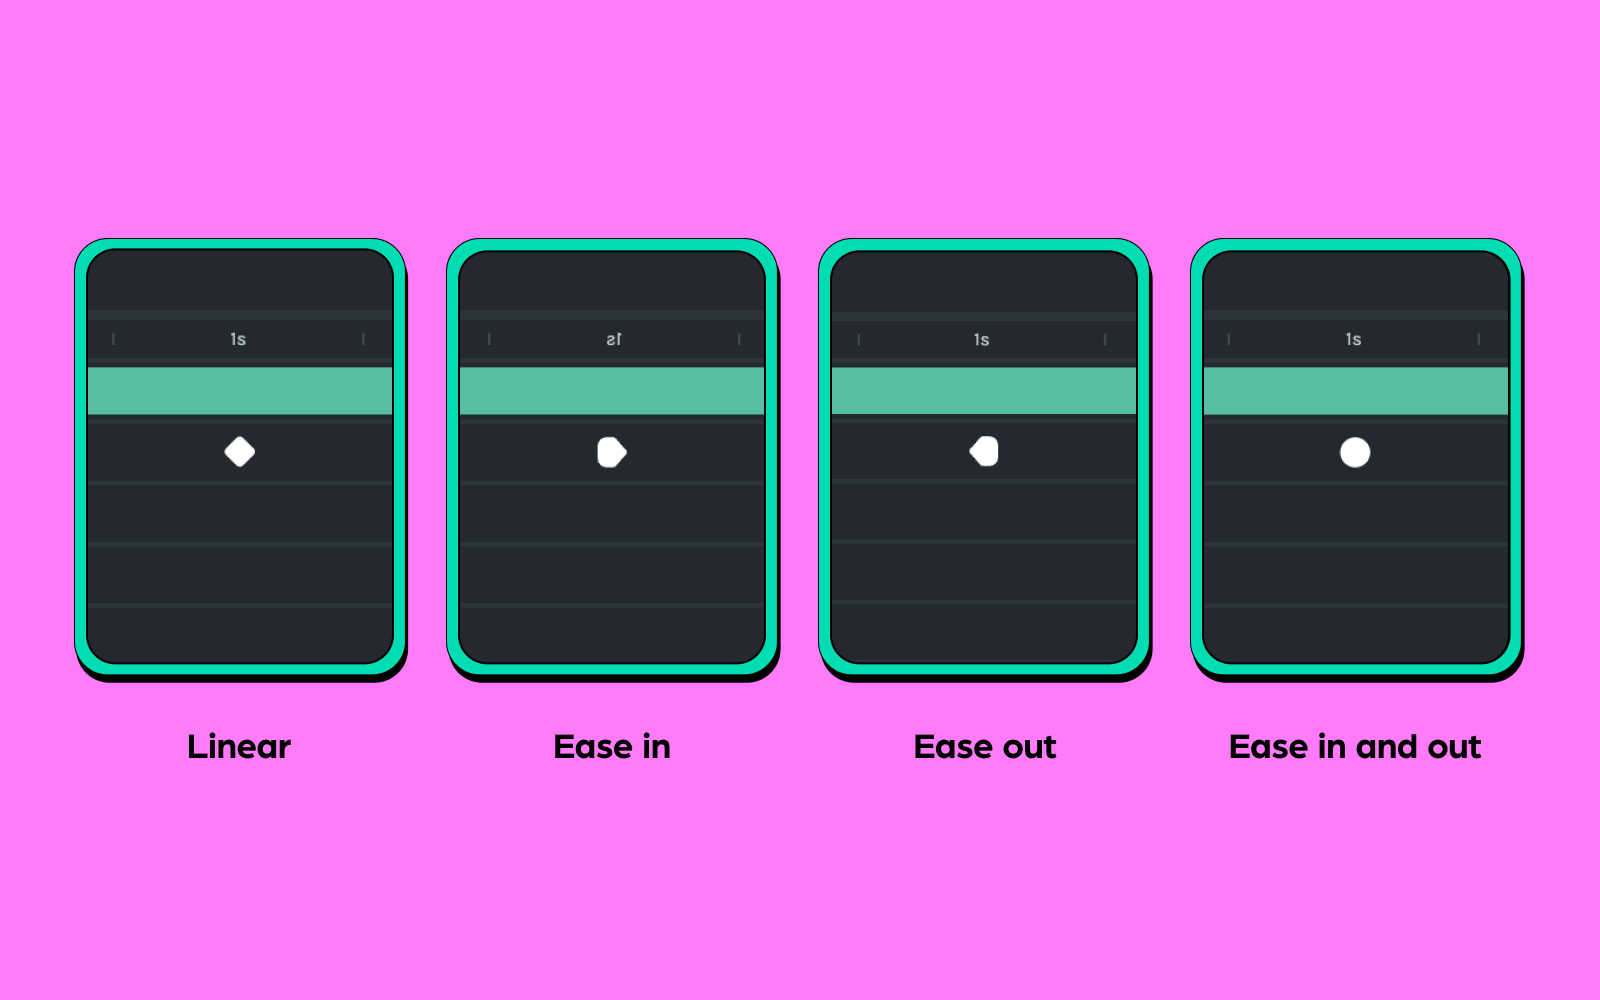
- Linear: Moves objects at a constant speed along a straight line trajectory - giving its unnatural or robotic look.
- Ease-in: This technique causes the animation to start slowly and then accelerate as it progresses toward the end of the keyframe. It's useful for scenarios where an object needs to start moving from a static position, giving a gradual buildup of speed which helps to emphasize acceleration.
- Ease-out: Conversely, ease-out makes the animation start at a faster pace and then decelerate as it approaches the next keyframe. This is useful for objects that need to settle into a position gently, simulating a deceleration and providing a smooth stop that mimics natural motion.Ease-in-out: This combines both techniques, starting the animation slowly, speeding up in the middle, and then slowing down again towards the end. It's ideal for enhancing the realism of the motion where you want a smooth transition both at the beginning and the end, such as an object that needs to move and then come to a natural rest.
- Ease-in-out: This combines both techniques, starting the animation slowly, speeding up in the middle, and then slowing down again towards the end. It's ideal for enhancing the realism of the motion where you want a smooth transition both at the beginning and the end, such as an object that needs to move and then come to a natural rest.
Now in Lottie Creator you can adjust to make it smoother in our out by two methods:Press the keyframe and right-click for the ease in option to appear. Easing options are available under the Smooth button where you can smooth to enter (in) or exit (out) or both.

Alternatively, you can use the panel - and select Smooth In or Smooth out or press both to get the in out effect
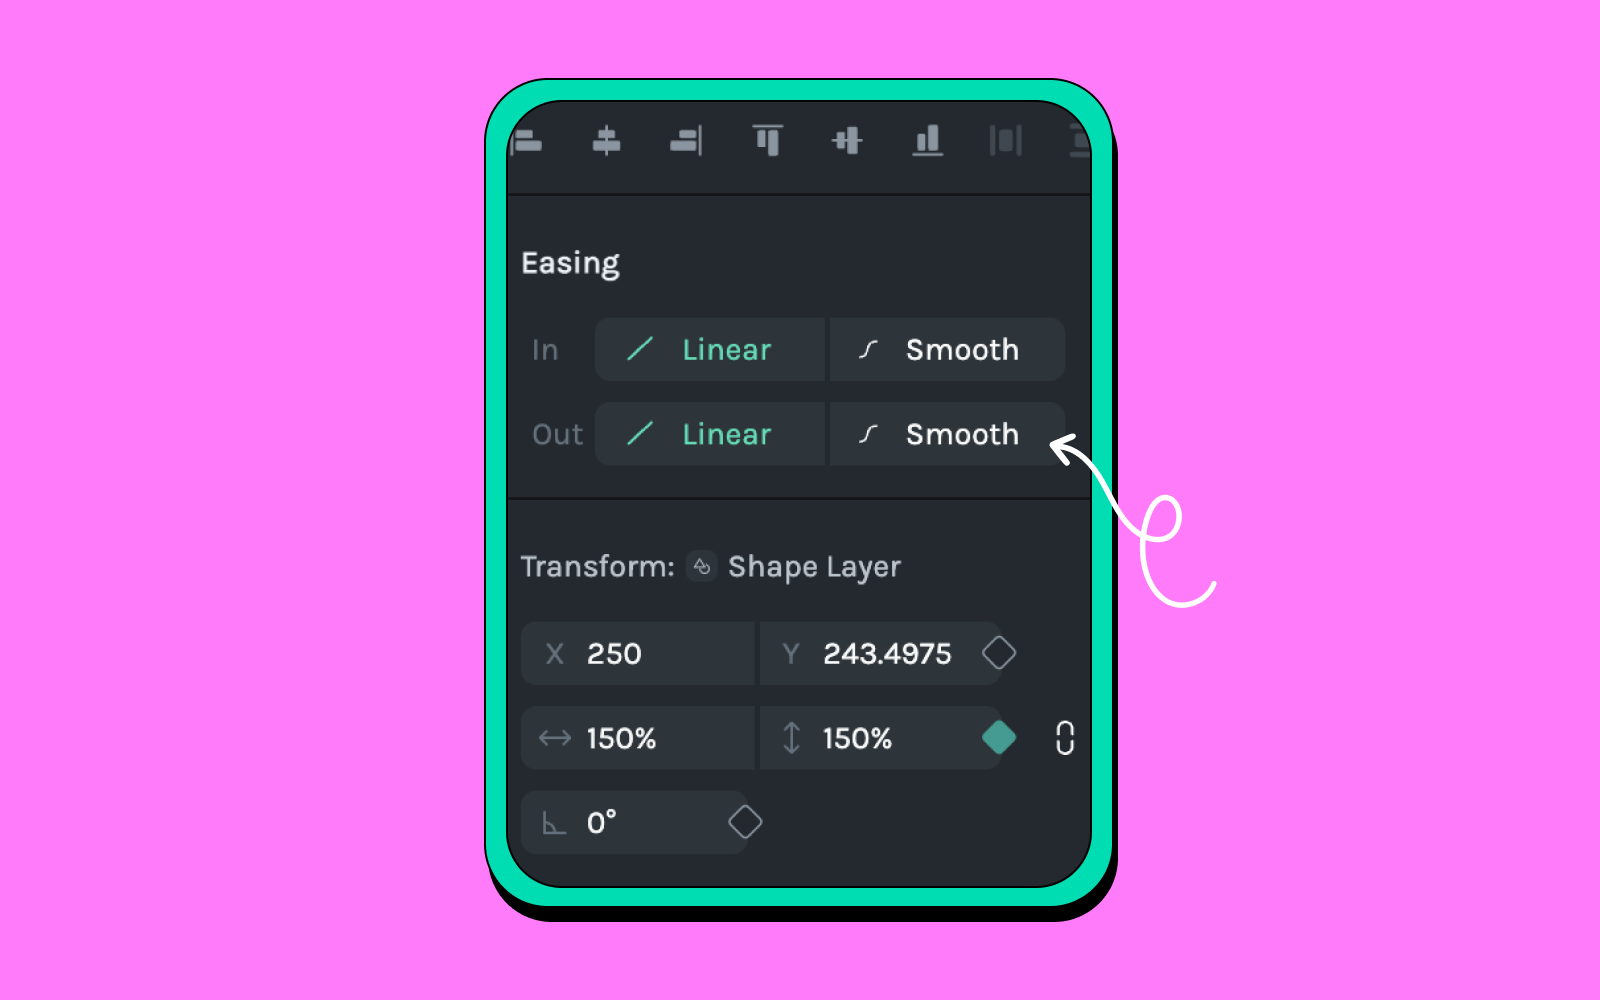
When activated, your keyframe will appear like so:
How to use the Duplicator plugin to multiple layers on Lottie Creator
Since its release, Lottie Creator has introduced several plugins to enhance the animation process. Among these plugins is the Duplicator.
The Duplicator plugin in Lottie Creator allows you to create multiple copies of layers, shapes, groups, or paths, with customizable options for angle, position, scale, and time shift.

Let try to make this flower animation with the help of the Duplicator plugin

- Prepare you design: Start with a single petal that you have created in advance. This will be the base for duplication.
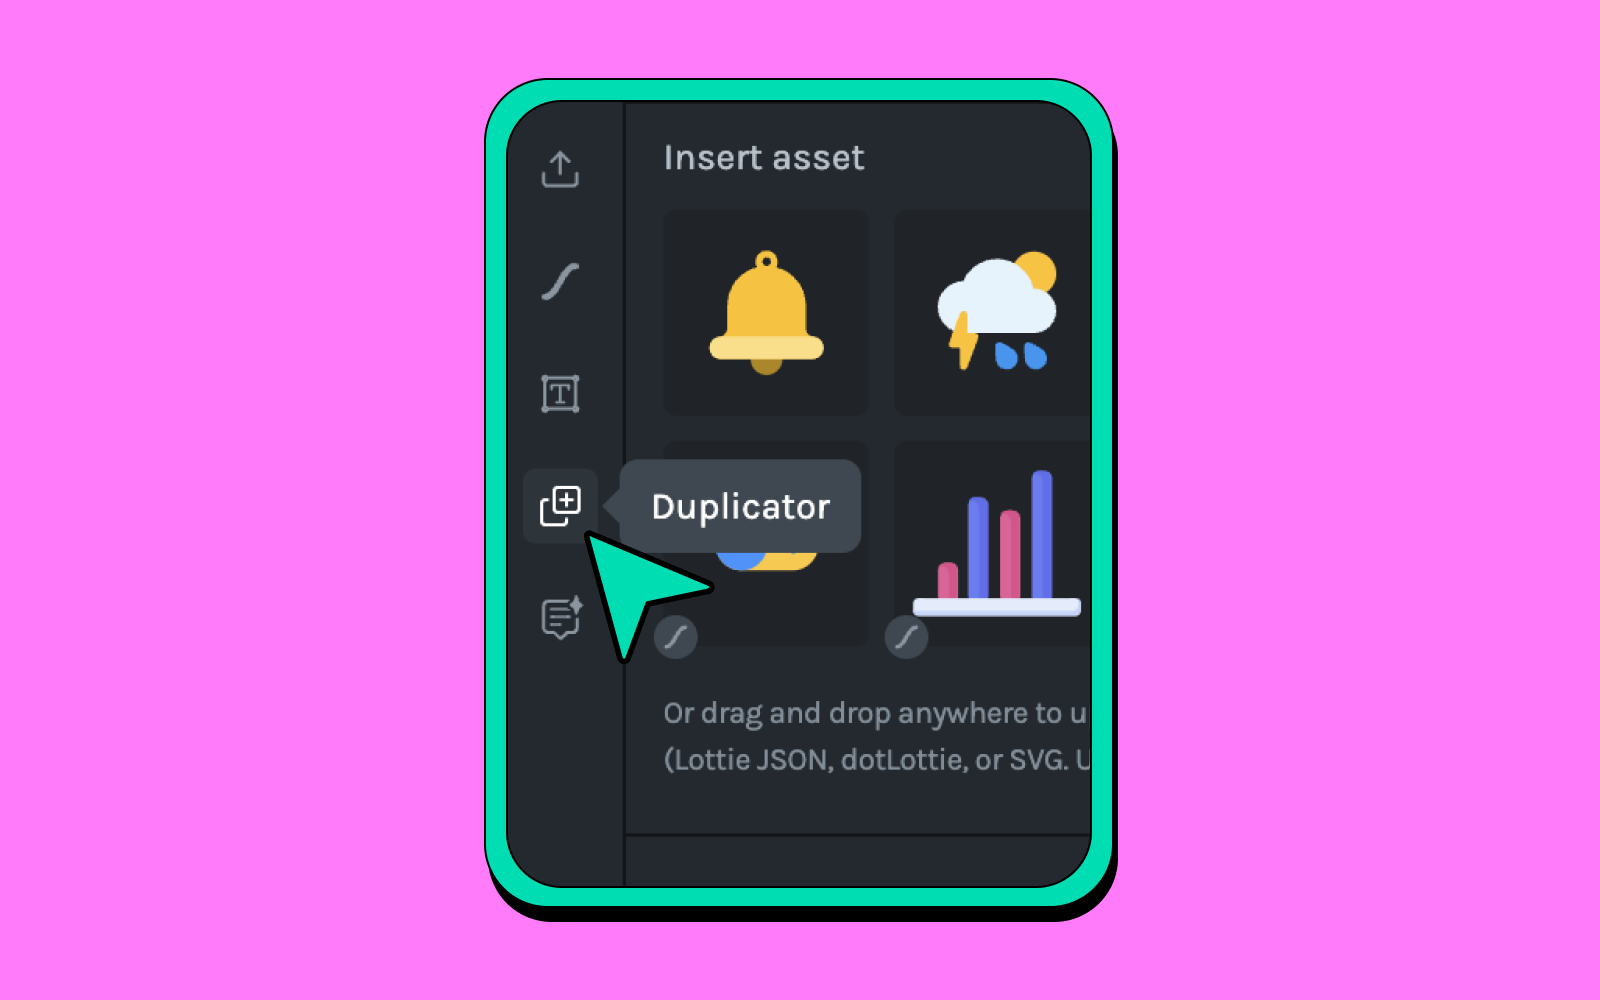
- Activate the plugin: Click on the Duplicator plugin located in the left side I/O menu of Lottie Creator. This will open a popup menu with various settings.
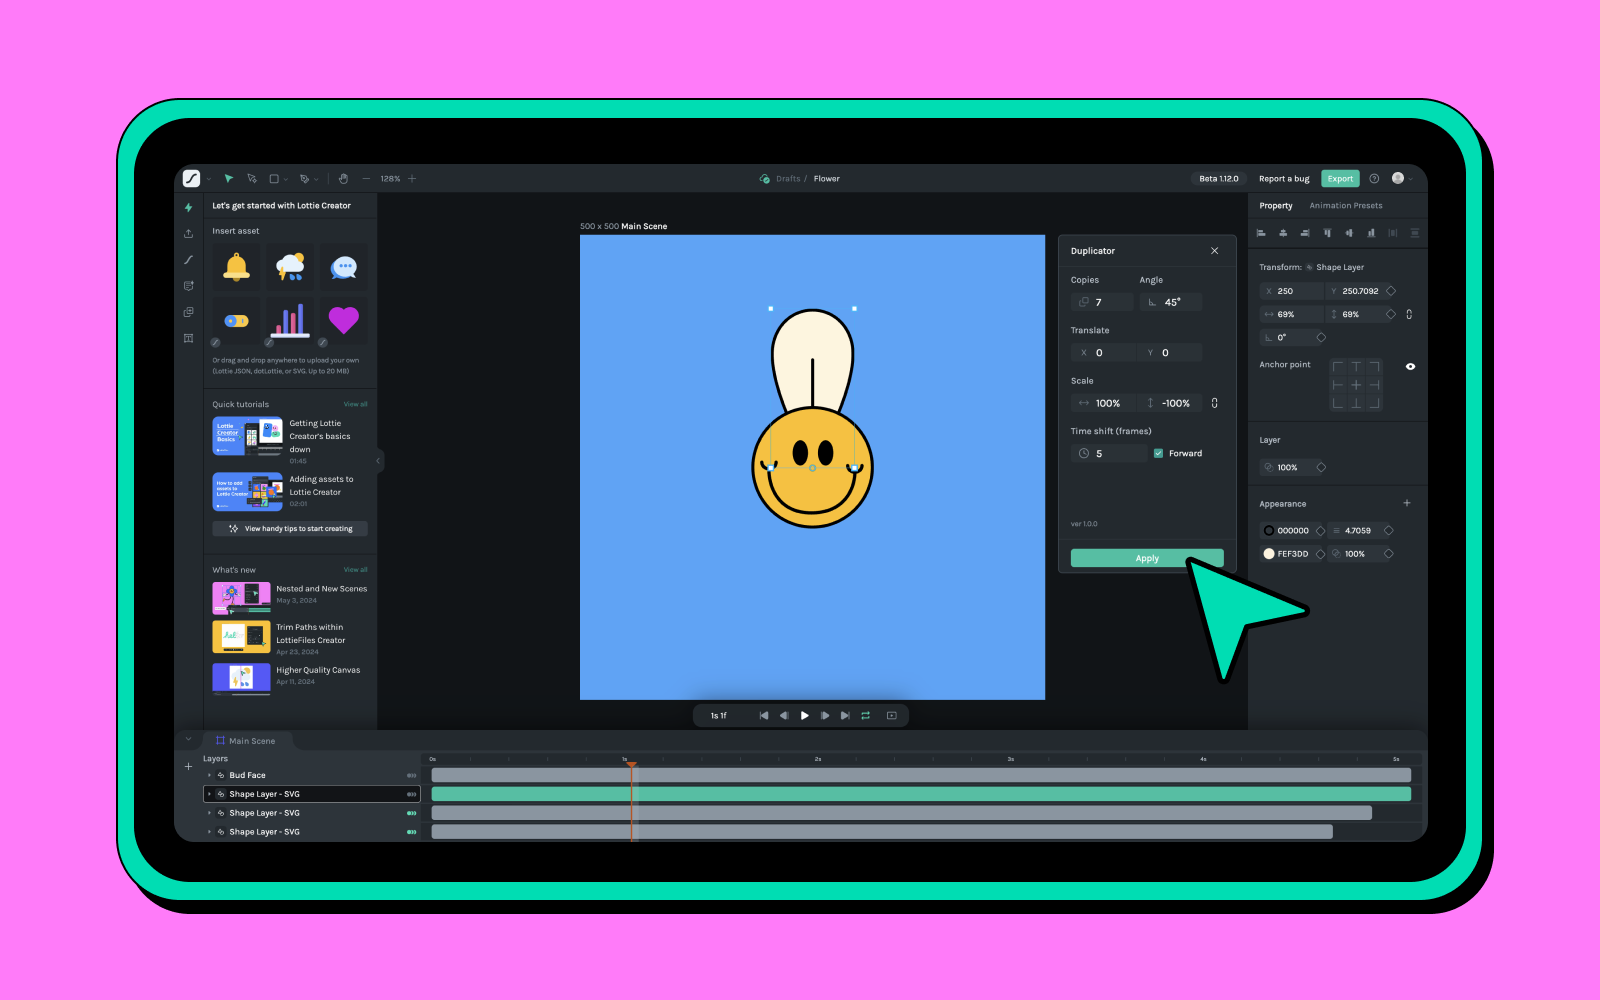
- Set the number of copies: In the 'Copies' field, enter '7'. This creates seven additional copies of your petal, resulting in a total of eight petals.
- Adjust the Rotation Angle: Set the 'Angle' to 45 degrees. This angle is chosen because dividing the 360 degrees of a circle by eight (the total number of petals) ensures even distribution around the circle.
- Positioning the copies: In the 'Translate' section, keep X and Y set to 0. This setting ensures that all petals are rotated around the original petal's position, maintaining a central anchor point for all petals.
- Scale: If you want
- Time shift the animation: Set the 'Time shift' to 5 seconds. This delay shifts each subsequent petal by 5 seconds relative to the previous one, creating a staggered animation effect.
- Apply the settings: Click the 'Apply' button to execute the duplication with your specified settings.
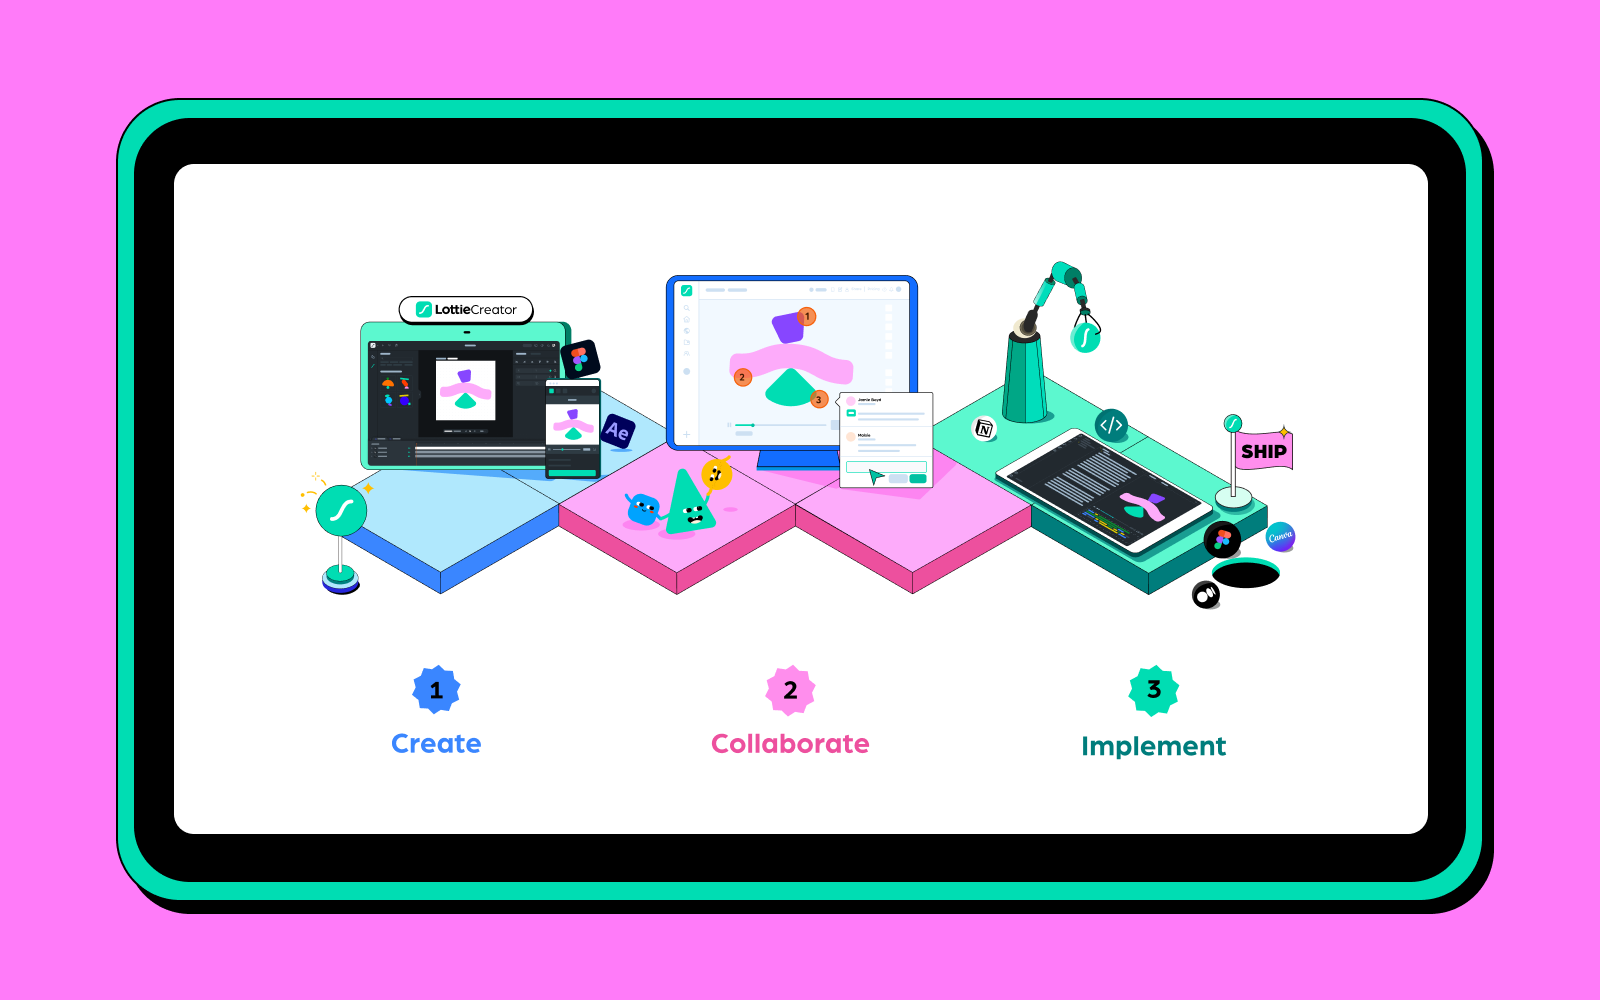
Lottie Creator as part of the LottieFiles ecosystem
Now that we have Lottie Creator, it completes the full ecosystem of LottieFiles. You can now easily create Lottie animations with Lottie Creator, collaborate with your team within the LottieFiles platform and ship it to your final destination, whether it's for the web pages, apps, or more.
Start your animation journey
And there you have it—a comprehensive walkthrough of Lottie Creator, tailored to help you maximize its full potential in your animation projects.
Remember, mastery comes with practice and experimentation. Dive in, adjust, and play with the features we've explored. Our dedicated support team is ready to assist if you face any challenges or have questions. As Lottie Creator continues to evolve, we're eager to hear your feedback and suggestions to enhance your experience further. Also, keep an eye on the LottieFiles Changelog for the latest updates to Lottie Creator.
Keep creating, keep animating, and stay tuned for more tutorials that will help you elevate your animation skills with Lottie Creator.
Happy creating!